Introduction
Wouldn’t it be great if you could listen to any music on/off Internet radio stations? Now recording from virtually any sound source passing through the computer speakers with Free Sound Recorder makes your dream come true. The recording has no requirements for server types or stream formats. For people who love internet radio broadcasts, Free Sound Recorder is convenient. Follow the steps below to Record Internet Streaming Audio!
Step 1. Activate Web Radio Recorder
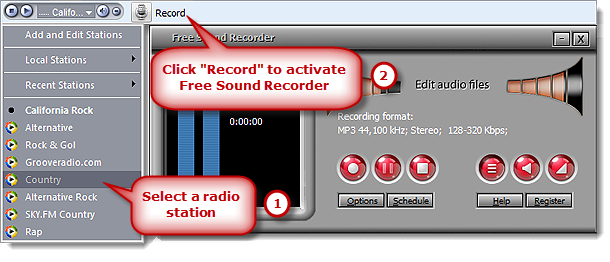
Launch Free Sound Recorder. Click the drop-down arrow on the radio player and pick a radio station from the drop-down menu. Then, the radio player will start buffering and then you will hear the sound. Click the “Record” button to activate the web radio recorder.

Step 2. Choose Sound Source and Sound Card
Click “Show mixer window” button to choose sound source from the “Recording Mixer” dropdown list. There are many kinds of sound source, including Stereo Mix, Phone Line, Aux Volume, Video Volume, Mic Volume, Line In, CD Audio and so on. Then, select proper recording device from “Recording Device” dropdown menu. Adjust the volume and balance.

Step 3. Adjust Recording Settings
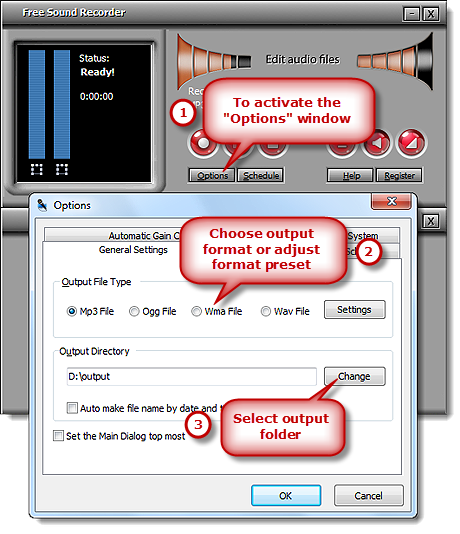
Click “Options” to activate “Options” window. In “General Settings” area, you can specify an output format among MP3, WAV, WMA and OGG. Click “Settings” to use the well-configured presets or specify the configuration parameters to adjust the recording quality. Click “Change” to select an output folder. It also has the ability to auto-name the recorded file by date and time.

Step 4. Start Recording
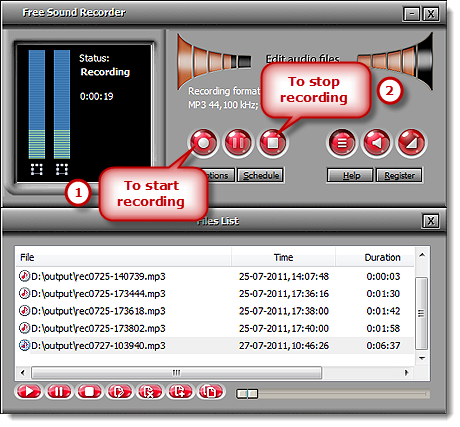
Click “Start recording” to start. Click “Stop recording” to stop. The recorded sound will be directly output to the output folder & listed in the file list with detailed information like filename, location, time and duration. You can play the recording with the built-in player.

